Scene Card Workflow: How to Plan Every Chapter Before You Write It
A clear scene card workflow turns vague ideas into a concrete plan. This method shows exactly how to build, order, and revise scene cards so your novel stays focused from first chapter to final page.
Free to start No credit card required
Smart Book Planner
Plan every scene before you draft chapter one
Smart Book Planner is free — map plot structure, scene cards, characters, and timelines in one workspace.
- 7-point plot structure
- Scene cards per chapter
- Character & timeline tracking
A good scene card workflow gives you control. Instead of writing into the unknown and hoping the story holds together, you build a visual map of every major moment before you type the first sentence of chapter one. The system is simple, flexible, and surprisingly effective for both discovery writers and strict plotters.
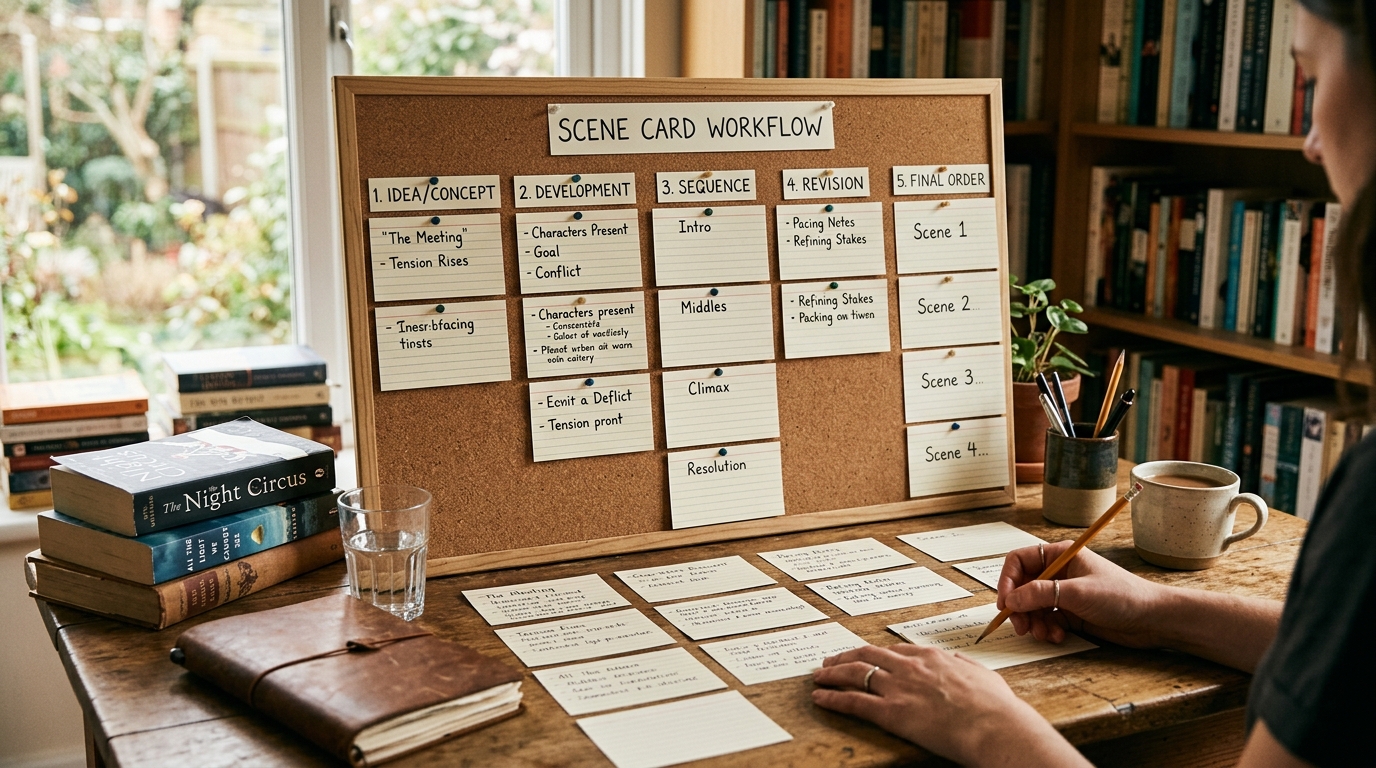
Think of each scene card as a single index card or digital note that captures one meaningful unit of action. When you finish laying them out, you can see the entire novel at a glance, spot pacing problems, and move pieces around without rewriting thousands of words.
What Exactly Is a Scene Card?
A scene card records the essential information for one scene or chapter section. At minimum it answers four questions:
- Who is in the scene and what do they want right now?
- What conflict or obstacle stands in their way?
- What changes by the end of the scene?
- Which characters or plot threads does this scene affect?
Strong cards also note the emotional tone, the setting, and any important sensory details you want to remember. The goal is not to write the prose yet. The goal is to make sure the scene earns its place in the story.
Why Scene Cards Beat Traditional Outlines for Most Novelists
Traditional chapter outlines often become walls of text that nobody enjoys revising. Scene cards stay modular. You can shuffle them on a table, drag them in a digital board, or pin them to a corkboard. When you realise the argument between your protagonist and her sister belongs earlier, you simply move the card. No need to rewrite the entire outline.
They also force you to think in terms of cause and effect. Each card ends with a clear change that sets up the next card. That single habit prevents the “nothing happens” problem that plagues many early drafts.
Physical Cards vs Digital Tools
Some writers swear by actual index cards and a big table. The tactile act of laying them out helps them feel the rhythm of the story. Others prefer digital boards because they can colour-code by character, theme, or POV and search instantly.
Both approaches work. Choose the one that keeps you moving forward. Many novelists begin with physical cards during early brainstorming, then transfer the final sequence into planning software for long-term development.
A Practical Scene Card Workflow You Can Start Today
Here is the exact process I use and teach. It scales from simple three-act stories to complex multi-POV novels.
Step 1: Brain Dump Every Possible Scene
Give yourself permission to be messy. Write one idea per card without judging quality or order. Include:
- Images that have been living in your head
- Conversations you overheard or imagined
- Emotional turning points for each major character
- Plot events required by your chosen structure (7-point plot structure, inciting incident, midpoint, dark night, climax, etc.)
Aim for at least 30–50 cards on a standard novel. You will cut and combine later. At this stage quantity matters more than quality.
Step 2: Sort into Rough Chronological Order
Lay the cards out in the sequence you think they might happen. Do not worry about perfect timing yet. Group cards that belong in the same chapter or sequence. Look for natural clusters. If three cards all revolve around the same argument, they may form one powerful chapter instead of three weak ones.
Step 3: Test Each Card Against Four Questions
Go through every card and strengthen it. Ask:
- Does this scene advance the external plot, the internal arc, or both?
- Is there clear conflict or tension?
- What does the reader learn or feel that they did not know before?
- Does the scene end on a note that makes the reader want to continue?
If a card fails most of these tests, either delete it or merge its useful parts into another card. Be ruthless. Every weak scene you remove now saves hours of revision later.
Step 4: Add Viewpoint and Emotional Valence
Decide who experiences each scene. Mark cards with the character’s initials or a colour. Then note the emotional charge at the beginning and end of the scene. A good novel usually alternates between positive and negative emotional movement. Long runs of the same valence create flat pacing.
Step 5: Look for Patterns and Gaps
Stand back and study the full layout. Ask yourself:
- Is one character dominating too many scenes?
- Are there long stretches without conflict?
- Have I forgotten to show the consequences of earlier decisions?
- Does the climax feel earned?
Move, combine, or create new cards to fix imbalances. This is the stage where the story starts to feel like an actual novel instead of a collection of ideas.
Step 6: Write Mini Scene Summaries
Once the order feels solid, expand each card into a one- or two-paragraph summary. Include key actions, important dialogue beats, and the exact change that occurs. These summaries become your writing compass. When you sit down to draft the chapter, you already know where you are going.
Common Mistakes to Avoid
Many writers treat scene cards as a one-time exercise. The best practice is to keep the cards alive throughout the drafting process. When you discover something new about a character during writing, update the relevant cards. When a subplot needs more development, add new cards and find the right place to insert them.
Another frequent error is making every card too detailed. If you write full prose on the card, you will resist changing it later. Keep the language high-level so the card remains a flexible tool rather than a rigid script.
Finally, do not aim for perfection on the first pass. The scene card workflow is iterative. You will rearrange cards multiple times. That is the point.
How Scene Cards Support Character Arcs and Subplots
Colour-coding cards by character reveals how often each person appears and whether their arc is progressing. If your antagonist has only three scenes in the entire middle of the book, you know you need to create more opportunities for conflict.
You can also create separate rows or swim lanes for subplots. This helps you weave them through the main story at the right rhythm instead of dropping them in clumps.
From Scene Cards to First Draft
Once your cards feel solid, you have two main paths. Some writers write one chapter at a time, using the relevant cards as a guide. Others write the entire first draft in a fast, loose style and use the cards only to check that they have not drifted too far from the intended shape.
Either way, the cards prevent the paralysis that comes from facing a completely blank page. You always know what the next scene needs to accomplish.
Revising with Scene Cards
The same cards become invaluable during revision. After you finish the first draft, create a new set of cards that reflect what you actually wrote. Compare the two sets. The differences often reveal where the story lost focus or where new opportunities appeared.
Many writers discover they can cut an entire subplot simply by removing six cards and writing two new bridging scenes. The visual nature of the system makes large structural changes feel manageable rather than terrifying.
Tools That Support a Scene Card Workflow
Physical index cards remain popular for good reason. A standard pack, coloured pens, and a large surface give you immediate spatial awareness. For writers who want to keep everything in one place, digital AI tools for novel planning that support movable cards or boards work well.
The important factor is that the tool stays out of your way. You should spend your energy thinking about story, not learning software.
Smart Book Planner was built exactly for this kind of modular planning. Its scene and chapter tools let you create, reorder, and tag cards while keeping every character, location, and timeline detail connected in the same workspace. When you are ready, you can export the entire manuscript to Kindle, EPUB, and PDF formats without losing your planning notes.
Make the Workflow Your Own
Some novelists use one card per chapter. Others use one card per significant scene within a chapter. A few writers create extra cards that track only setting or mood. Experiment until the system feels natural to you. The best workflow is the one you will actually use consistently.
Start small. Take the novel idea that has been living in your head and create ten scene cards this week. Arrange them. Test them against the four questions. You will quickly see where the story is strong and where it needs more thought.
That clarity is worth far more than another generic outline that gathers digital dust. A living set of scene cards turns planning from a chore into a creative conversation with your story.
Key Takeaways
Free to start
Put these takeaways into a free scene-card workspace
Plan plot, characters, and timelines in Smart Book Planner — free, unlimited books.
- Each scene card should capture one meaningful unit of change in your story.
- Focus first on generating many cards, then on ordering and strengthening them.
- Use the four core questions to test whether a scene earns its place.
- Keep cards high-level so they remain flexible during drafting and revision.
- Update your cards as new insights appear; they are living tools, not fixed plans.
- Compare your initial card sequence with the finished draft to diagnose structural problems quickly.
- Choose whatever format (physical or digital) helps you see the whole story at once.
See also: Why a Template Workflow Beats Free-Form Note-Taking.
See also: How to Build an Effective Scene Card System for Your Novel.
See also: How a Research Paper Template Workflow Keeps Your Ideas Organised.
Frequently Asked Questions
How many scene cards does a novel need?
Most novels work well with 40 to 70 cards. Short stories may need only 8 to 15. The exact number matters less than whether every card advances character or plot.
Should I write full dialogue on the cards?
Generally no. A few key lines can be helpful, but writing full exchanges on the card often locks you into wording before you have lived with the characters long enough.
Can I use scene cards if I am a pantser?
Yes. Many discovery writers create a loose set of cards for the major turning points only, then allow themselves to explore everything in between. The cards act as guardrails rather than train tracks.
What if I change my mind halfway through the draft?
Update the cards. Move them. Add new ones. The system is designed to evolve with your understanding of the story. The time you invested in the original cards is not wasted; it gave you a strong starting point.
The scene card workflow is not about removing creativity. It is about giving your creativity a reliable structure so it can do its best work. When you know where each scene fits and what it must accomplish, the actual writing becomes a pleasure instead of a guessing game.
Once your manuscript is complete, promote your self-published book so your finished novel reaches the widest possible audience.
Sources
Writersdigest · Blog · Masterclass · Thecreativepenn
Free to start No credit card required
Smart Book Planner
Keep your story consistent from hook to resolution
Unlimited books and chapters on the free plan. Pro adds AI when you want it.
- 7-point plot structure
- Scene cards per chapter
- Character & timeline tracking